A tale of crafty endeavours, garden battles and feline intrigue
Buzzzzz....
The Summer Of Buzz art exhibition at the Art House in Southampton opened yesterday. and my bee embroidery is there, which is exciting! It's on until the 28th September and is well worth a visit (I can also recommend the Beany Nachos and the spicy rum....).
If you want to download a free pattern for my bee, it's available on Craftsy and Payhip. Let me know if you make it and I'll feature your version in a future blog post.
If you want to download a free pattern for my bee, it's available on Craftsy and Payhip. Let me know if you make it and I'll feature your version in a future blog post.
Pattern Celebrations!
I just added up my free pattern "sales" for the last tax year on Payhip and Craftsy, and I had over 500 downloads, which I'm very excited by! By the far the most downloaded was Buzzzzz, which seems very appropriate for this time of year as cherry blossom is appearing and there are random bees buzzing around. People think I'm strange for talking to bees, but it makes me happy....

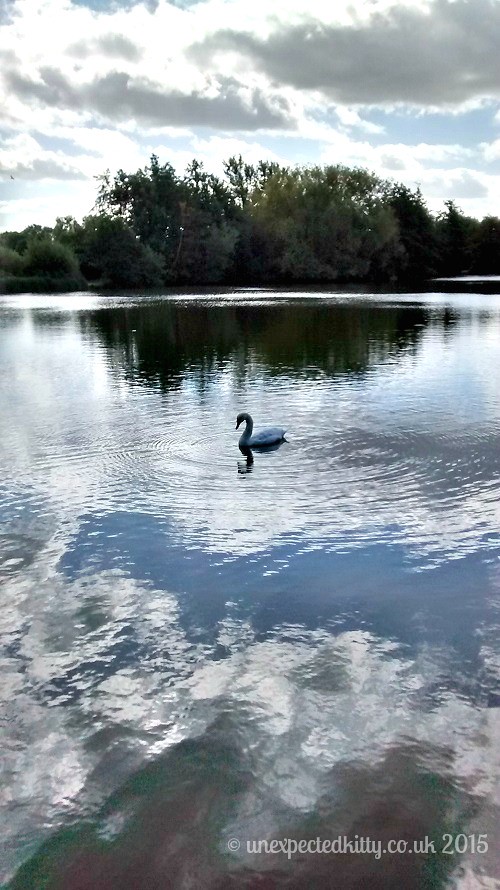
This is where I found Flash this morning
I've been sorting out my gigantic fabric stash into giant laundry bags. Apparently they make great sleeping places. I should probably have done the zip up as Flash has very firmly wedged himself in there ....

Embroidery Using Fabri-Solvy - A Cautionary Tale
I've always been a bit impatient when using windows or light boxes to trace embroidery patterns. When I chose the Santa Monica Pier pattern to stitch from Studio MME's new pattern book, I knew I would have trouble with all the straight lines. I've tried an iron-on transfer pencil before and the results weren't as accurate as I needed, then I remembered that I had already bought some Fabri-Solvy*. Here's how I used it to transfer my pattern, and the lessons I learned...

First I printed the pattern. The Fabri-Solvy went through my printer really easily.

I then cut down the sheet to fit on the hoop and tacked it to my cotton fabric. It is sticky so I might not have needed to do this.

While stitching, the Fabri-Solvy puckered a bit, I don't know if it wasn't stretched tight enough. There was some resistance, but no sticky needle problem that others have reported.

After finishing stitching, I trimmed the Fabri-Solvy back to near the stitches.

I then swished it around in warm water until it stopped being gloopy.

I left it to dry on a towel, then ironed it.

Once it was dry, I could see marks where the printer ink had run (down from the struts of the pier and around the windows - just about visible in the photo below). Originally I thought it was the DMC thread that had run, but I have since found another site where someone has mentioned a problem with the printer ink, so I'm assuming it was that. I was VERY annoyed (especially as it was destined for Megan's book), tried rinsing it again, no change. Grrrrrr. Next time I try this, I will print the pattern in a very light grey to prevent this. Some of my stitches now look a bit wobbly, I assume that's due to stitching through several layers then removing one. My stitches didn't look at all loose when I was making it, but I guess I will have to stitch tighter in the future when using Fabri-Solvy.

Would I use Fabri-Solvy* again? Yes, as it made transferring the pattern and keeping straight lines a doddle. I really really wish I'd tried a tiny sample first to work out the kinks though.
* Amazon affiliate link
First I printed the pattern. The Fabri-Solvy went through my printer really easily.
I then cut down the sheet to fit on the hoop and tacked it to my cotton fabric. It is sticky so I might not have needed to do this.
While stitching, the Fabri-Solvy puckered a bit, I don't know if it wasn't stretched tight enough. There was some resistance, but no sticky needle problem that others have reported.
After finishing stitching, I trimmed the Fabri-Solvy back to near the stitches.
I then swished it around in warm water until it stopped being gloopy.
I left it to dry on a towel, then ironed it.
Once it was dry, I could see marks where the printer ink had run (down from the struts of the pier and around the windows - just about visible in the photo below). Originally I thought it was the DMC thread that had run, but I have since found another site where someone has mentioned a problem with the printer ink, so I'm assuming it was that. I was VERY annoyed (especially as it was destined for Megan's book), tried rinsing it again, no change. Grrrrrr. Next time I try this, I will print the pattern in a very light grey to prevent this. Some of my stitches now look a bit wobbly, I assume that's due to stitching through several layers then removing one. My stitches didn't look at all loose when I was making it, but I guess I will have to stitch tighter in the future when using Fabri-Solvy.
Would I use Fabri-Solvy* again? Yes, as it made transferring the pattern and keeping straight lines a doddle. I really really wish I'd tried a tiny sample first to work out the kinks though.
* Amazon affiliate link
Monstrous Discounts
If you were considering buying one of my monster portraits or the Halloween embroidery pattern, now is a really good time!

Until the end of March, use the coupon code MARCHHOOPS to get 10% off any monster hoop in my Etsy shop.

My Halloween embroidery pattern is also reduced to 99p during March in my Payhip shop.
Until the end of March, use the coupon code MARCHHOOPS to get 10% off any monster hoop in my Etsy shop.
My Halloween embroidery pattern is also reduced to 99p during March in my Payhip shop.
West Coast Love Embroidery Book Review
A few month's ago, Megan from Studio MME asked for volunteers to help stitch patterns for her upcoming embroidery book based on the West Coast of the USA. I've always loved her patterns so jumped at the chance. The book has now been launched and looks GORGEOUS!
In Megan's own words: "West Coast Love lets West Coasters stitch up their local pride. From the Golden Gate Bridge to the Seattle Space Needle, this 100+ page digital pattern book gives you a tour of the seaside states. In addition to man-made landmarks, you can stitch up iconic birds, alternative state flags, and national park monuments. West Coast Love is the first pattern book by Megan Eckman, the designer behind Studio MME. Her patterns are simple to sew but intricate in their design, letting you curl up on the couch with a beer while you stitch something beautiful."

The book is beautifully laid out, with very clear patterns and a beginner-friendly stitch guide. It also includes extensive instructions on transferring the patterns to fabric and finishing the projects, which are shown as hoops and pennants. The patterns themselves look really impressive once stitched up, and I love the cute introductions to each section of the West Coast, and Megan's interpretations of the state flags, including a grizzly bear for California!
You can see the level of detail she has included here, for a hoop showing the Golden Gate bridge. It's really easy to see which stitches to use to get the same effect as the picture, and the suggested colours work really well.


I love the sketch-like effect of the grass and plants in the Hollywood sign pattern, it's really representative of Megan's style.

I was sent the Santa Monica Pier hoop to stitch. It was a new challenge for me as I haven't done much stitching involving straight lines, and there were lots of them in this pattern! I used Fabri-Solvy to transfer the pattern (not one of the transfer suggestions in the book) and had a few problems with it (more on that next week) but the pattern itself was really fun and easy to stitch.

I've never been to the West Coast (I've only been to New Orleans) but so many of the landmarks in these patterns were immediately recognisable. I've also only been on a Ferris Wheel once and I thought I was going to throw up every time it went over the top. I'm not great at fairground rides...
You can buy the book on Megan's site at: http://www.studiomme.com/shop.
In Megan's own words: "West Coast Love lets West Coasters stitch up their local pride. From the Golden Gate Bridge to the Seattle Space Needle, this 100+ page digital pattern book gives you a tour of the seaside states. In addition to man-made landmarks, you can stitch up iconic birds, alternative state flags, and national park monuments. West Coast Love is the first pattern book by Megan Eckman, the designer behind Studio MME. Her patterns are simple to sew but intricate in their design, letting you curl up on the couch with a beer while you stitch something beautiful."
The book is beautifully laid out, with very clear patterns and a beginner-friendly stitch guide. It also includes extensive instructions on transferring the patterns to fabric and finishing the projects, which are shown as hoops and pennants. The patterns themselves look really impressive once stitched up, and I love the cute introductions to each section of the West Coast, and Megan's interpretations of the state flags, including a grizzly bear for California!
You can see the level of detail she has included here, for a hoop showing the Golden Gate bridge. It's really easy to see which stitches to use to get the same effect as the picture, and the suggested colours work really well.
I love the sketch-like effect of the grass and plants in the Hollywood sign pattern, it's really representative of Megan's style.
I was sent the Santa Monica Pier hoop to stitch. It was a new challenge for me as I haven't done much stitching involving straight lines, and there were lots of them in this pattern! I used Fabri-Solvy to transfer the pattern (not one of the transfer suggestions in the book) and had a few problems with it (more on that next week) but the pattern itself was really fun and easy to stitch.
I've never been to the West Coast (I've only been to New Orleans) but so many of the landmarks in these patterns were immediately recognisable. I've also only been on a Ferris Wheel once and I thought I was going to throw up every time it went over the top. I'm not great at fairground rides...
You can buy the book on Megan's site at: http://www.studiomme.com/shop.
Thursday Things
- Embroidered travel souvenirs
- Recycled textile sculptures
- Ink and watercolour kitties
- Hedgehogs being adorable
There will be a non-linky post coming up soon, I promise. I have a few exciting announcements coming up!
New Monsters - Romance Edition!
New monster accessories have appeared in my shop...

Cutie monster brooch!

Eyeball monster will keep an eye on your keys!

Horny monster (ummm...) will make your hair more monsterlicious!
Cutie monster brooch!
Eyeball monster will keep an eye on your keys!
Horny monster (ummm...) will make your hair more monsterlicious!
Adventures In Steamed Shibori
I've been taking a City and Guilds level 3 embroidery course at a local college, and this week we tried steamed shibori which was SUCH FUN!
The basic idea is to create structure in fabric through the use of steam. Synthetic fabrics keep their shape when washed, natural fabrics do not. We used a vegetable steamer for 20-25 minutes at a time, tying or stitching objects and creases in the fabric, steaming them then untying the fabric to see what effects we had created, which were often quite unexpected.

This was satin tied around screws. I realised afterwards that the tying thread should have gone more accurately in the threads of the screws to get a more realistic effect.

This is organza tied around screws then coloured with silk paints (which then bled all over the steamer). This doesn't show the screw effect as well as the silk one but I still quite like it.

Beads gave a much more even effect.

I have no idea what this fabric is, kind of nylon Tyvek? It held the bead shape really well.

I love the organic look of this one, which was the most fiddly with using pearl-sized beads in the middle. The larger beads unexpectedly bled colour - I would rather it was all one colour with just texture differences but I don't hate the effect.
I was really inspired by textile artist Michelle Griffiths - I found a Pinterest board here that has some of her amazing screw pieces. I don't know if this technique will fit in with my plans for the final 3D embroidered piece for the course, but I do really want to try it again.
Have you tried any unusual textile techniques that I should investigate?
The basic idea is to create structure in fabric through the use of steam. Synthetic fabrics keep their shape when washed, natural fabrics do not. We used a vegetable steamer for 20-25 minutes at a time, tying or stitching objects and creases in the fabric, steaming them then untying the fabric to see what effects we had created, which were often quite unexpected.
This was satin tied around screws. I realised afterwards that the tying thread should have gone more accurately in the threads of the screws to get a more realistic effect.
This is organza tied around screws then coloured with silk paints (which then bled all over the steamer). This doesn't show the screw effect as well as the silk one but I still quite like it.
Beads gave a much more even effect.
I have no idea what this fabric is, kind of nylon Tyvek? It held the bead shape really well.
I love the organic look of this one, which was the most fiddly with using pearl-sized beads in the middle. The larger beads unexpectedly bled colour - I would rather it was all one colour with just texture differences but I don't hate the effect.
I was really inspired by textile artist Michelle Griffiths - I found a Pinterest board here that has some of her amazing screw pieces. I don't know if this technique will fit in with my plans for the final 3D embroidered piece for the course, but I do really want to try it again.
Have you tried any unusual textile techniques that I should investigate?
Christmas Craftiness Part 2
I completely forgot to take a photo of this before I wrapped it up, luckily Anna Marie was kind enough to send me a photo of it on her wall.

This was made from the weelittlestitches "Pixel People In Love" pattern featuring the Joker and Harley Quinn. It was mostly stitched on the ferry to and from the Isle Of Wight (I'm determined to go looking for red squirrels the next time I'm over there).The strange green Aida was a lucky find at a local charity shop, and I painted the hoop with black acrylic paint. I always forget how long cross stitch takes when there aren't many large blocks of colour - probably why I have so many unfinished projects!
This was made from the weelittlestitches "Pixel People In Love" pattern featuring the Joker and Harley Quinn. It was mostly stitched on the ferry to and from the Isle Of Wight (I'm determined to go looking for red squirrels the next time I'm over there).The strange green Aida was a lucky find at a local charity shop, and I painted the hoop with black acrylic paint. I always forget how long cross stitch takes when there aren't many large blocks of colour - probably why I have so many unfinished projects!
Subscribe to:
Posts (Atom)